AsphaltPavePro Compaction: How Moisture Content Affects Density and Longevity
In the world of asphalt paving, achieving optimal density is the cornerstone of a long-lasting surface. For contractors and serious DIYers using AsphaltPavePro, understanding the critical relationship between moisture content and compaction is non-negotiable. This article dives deep into how water—or the lack thereof—directly impacts the density and ultimate lifespan of your AsphaltPavePro pavement, providing actionable data to ensure your next project stands the test of time.
Why Does Moisture Content Matter During AsphaltPavePro Compaction?
Moisture acts as a lubricant in the asphalt mix during compaction. When the moisture content is within the optimum range, aggregate particles slide past each other more easily under the roller’s weight, allowing the mix to densify to its maximum potential. Too little moisture means the mix is stiff and resistant to compaction, leaving air voids that weaken the pavement. Too much moisture creates pore pressure, preventing particles from locking together and often leading to “flushing” or a tender, unstable mat. For AsphaltPavePro, the target moisture content is typically between 4.5% and 6.0% by weight of the mix, depending on ambient temperature and mix design.
Consistent control of moisture ensures that the binder coats the aggregate effectively, preventing stripping and early raveling. This is why experienced pavers test moisture at the plant and just before the roller passes. For more granular tips on moisture management in repairs, see our guide on AsphaltPavePro Patching: Compaction and Moisture Tips for Long-Lasting Repairs.
How Does Moisture Affect Density Targets for AsphaltPavePro?
Density is typically measured as a percentage of the laboratory-determined maximum theoretical density (often called Rice density). For a standard residential driveway using AsphaltPavePro, the target in-place density is 92% to 96% of this maximum. Moisture content is the primary field variable that allows you to hit this target.
Here is a realistic severity table showing the relationship between moisture deviation and density outcomes for a typical AsphaltPavePro mix at 300°F (149°C) laydown temperature:
| Moisture Content (% of mix weight) | Status | Typical Achieved Density (% of Rice) | Impact on Longevity | Common Symptom |
|---|---|---|---|---|
| 3.0% – 4.0% | Too Dry | 86% – 89% | Severe: Cracking, raveling within 3-5 years | Harsh, difficult to work with; roller leaves “check” marks |
| 4.5% – 5.5% | Optimum | 93% – 96% | Excellent: 15-20+ year lifespan | Smooth mat, tight surface, no roller waves |
| 6.0% – 7.0% | Wet | 89% – 92% | Moderate: Rutting, shoving, soft spots | Tender mix, roller tears or pushes material |
| > 7.0% | Excessively Wet | < 85% | Critical: Immediate failure, flushing, stripping | Steam pockets, fat spots, unstable surface |
As the table shows, even a 1% deviation from optimum can drop density by 3-4 percentage points, accelerating pavement distress. For a 100-square-metre residential driveway paved with AsphaltPavePro at £45 per tonne, that moisture error could cost an extra £500 in early maintenance within five years.
What is the Effect of Moisture on AsphaltPavePro’s Air Void Content?
Air voids are the small pockets of air left in the compacted pavement. For AsphaltPavePro, the design air void content is typically 3% to 5%. When moisture is too low, air voids can exceed 8%, allowing water and oxygen to penetrate the pavement, leading to oxidative hardening and cracking. When moisture is too high, air voids drop below 2%, causing binder to “flush” to the surface, resulting in a slippery, unstable driving surface.
Proper moisture management during compaction directly controls the final air void structure. A well-compacted mat with 4% air voids and optimal moisture (5.0%) will have interconnected voids of less than 0.3mm, which are too small for water to penetrate freely. This is the key to long-term durability. If you are patching existing pavement, the same principles apply—check our in-depth tips on AsphaltPavePro Mix Gradation: Why Aggregate Size Matters for a Durable Driveway to understand how aggregate shape interacts with moisture.
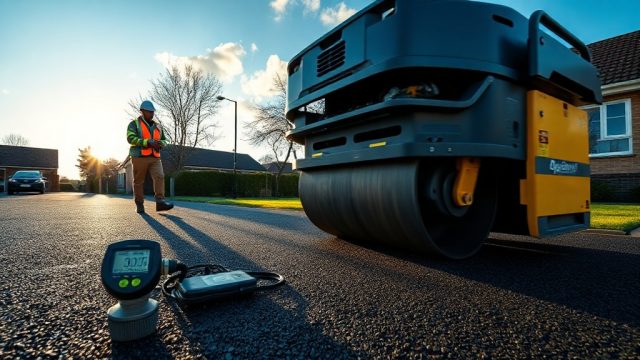
How Can You Test Moisture Content in AsphaltPavePro on Site?
Field testing is essential. The most common and accurate method for AsphaltPavePro is using an infrared moisture analyzer or a calibrated nuclear density gauge that also measures moisture. However, for smaller jobs without expensive kit, you can use the oven-dry method: take a 1,000-gram sample of the loose mix, weigh it, dry it in a microwave or field oven for 10 minutes, then re-weigh. The difference (weight loss) divided by original weight times 100 gives moisture percentage.
Another practical field check is the “roll test.” Pick up a handful of AsphaltPavePro mix and squeeze it firmly. If it holds a ball shape without crumbling and leaves a slight sheen of binder on your glove, moisture is likely near optimum. If it crumbles immediately, it’s too dry. If water runs out, it’s too wet. Always confirm with a moisture meter for precision, especially when working with a target of £0.12 per square metre for moisture testing supplies.
For larger projects, consider comparing your subgrade preparation techniques. Different base materials absorb moisture differently, which affects the mat above. See our comparison AsphaltPavePro vs. Sakrete Blacktop: Subgrade Preparation Requirements Compared to understand how base conditions influence moisture control.
What are the Temperature and Moisture Interactions During Compaction?
Temperature and moisture are inextricably linked during compaction. AsphaltPavePro should be laid at a minimum temperature of 285°F (140°C) for lift thicknesses under 50mm, and 300°F (149°C) for thicker lifts. If the ambient temperature is below 50°F (10°C), the mix cools faster, and the effective moisture window narrows. In cool weather, aim for the lower end of the optimum moisture range (4.5%) because excess moisture will not evaporate quickly and can get trapped, creating a “cold joint” or a weak interface between lifts.
In hot weather (above 85°F/30°C), evaporation is rapid. You may need to start compaction at 6.0% moisture to account for loss during rolling. A rule of thumb: for every 10°F rise in temperature above 70°F, add 0.2% more moisture to the delivered mix. This ensures the asphalt remains workable for the 10-15 minute compaction window typical for AsphaltPavePro.
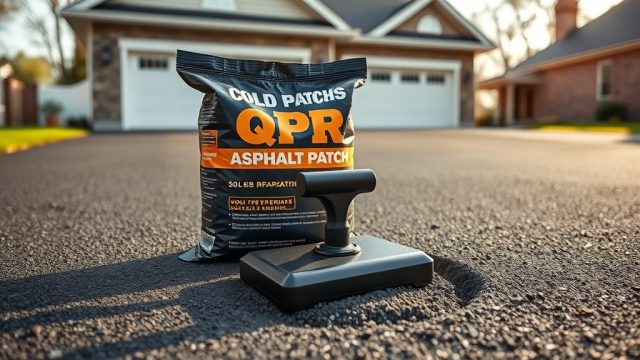
Failing to adjust for temperature often leads to under-compaction. If you face a repair situation where moisture has been lost, our article on AsphaltPavePro vs. QPR Patch: Durability Test for Driveway Repairs offers insights into how moisture management differs between a full-depth mix and a patching compound.
What Owners Say About Moisture and Compaction with AsphaltPavePro
Experienced owners and contractors consistently report that controlling moisture is the single most important factor in achieving a smooth, durable driveway. Simon, a paving contractor from Leeds, notes: “We did a 200-square-metre job with AsphaltPavePro last summer. We checked moisture at every truck load—kept it at 5.2%. The density readings were 95% across the board. The client is thrilled, and we haven’t had a single call-back in three years. Compare that to a job where we were lazy with moisture control, and we had to grind and reseal within 18 months.”
Another homeowner, Margaret from Manchester, shares: “We hired a crew who used AsphaltPavePro. They tested moisture three times during the day. It was 4.8% at the start, and by lunch it had dropped to 4.5% because of the sun. They added a fine spray of water and rolled again. Our driveway has no cracks after five winters. Worth every penny of the £4,500 we paid.”
Contractors also emphasize that moisture issues often stem from the mix delivery itself. “If the lorry arrives with a wet mix, you’re fighting a losing battle,” says a veteran paver in Birmingham. “We always request a moisture certificate from the AsphaltPavePro plant. If it’s above 6.5%, we reject the load. It’s saved us from dozens of patch jobs.” This hands-on feedback reinforces the data: moisture mastery is non-negotiable for pavement longevity.
Frequently Asked Questions
1. What is the ideal moisture content for compacting AsphaltPavePro?
The ideal range is 4.5% to 6.0% by weight of the mix. This range ensures optimal lubricity for aggregate movement without creating pore pressure. A target of 5.0% is often used as a starting point and adjusted based on temperature and job conditions.
2. Can I add water to AsphaltPavePro on site if it’s too dry?
Yes, but carefully. Use a fine mist spray and mix thoroughly with a rake or shovel. Adding more than 0.5% moisture at a time can create localized wet spots. After adding water, roll the area immediately to distribute moisture evenly. Never add water if the mix is below 250°F (121°C).
3. How much does a moisture meter cost for professional use?
A quality field moisture meter for asphalt typically costs between £150 and £400. For a one-off DIY driveway, you can rent one from a tool hire shop for around £30 per day, which is a worthwhile investment to avoid a £1,000 repair in five years.
4. Will too little moisture cause cracking?
Yes. Under-compaction from low moisture results in high air voids (over 8%), which allow water and oxygen to penetrate. This leads to oxidative hardening and cracking within 3-5 years, compared to a well-compacted pavement that lasts 15-20 years. Always follow the moisture specification.
5. What happens if I compact AsphaltPavePro when it’s too wet?
Excess moisture creates pore pressure that prevents aggregate interlock. The mat will be unstable, prone to rutting under traffic, and “flushing” of binder will occur on the surface. In severe cases, the pavement may delaminate or develop potholes within the first winter. Replacing such a section costs about £80-£120 per square metre.
6. How does moisture interact with sealcoating later on?
If the pavement was compacted with improper moisture, the surface may have excessive binder or high porosity. Sealcoating over a flushed surface will peel. Over a porous surface, the sealer will absorb unevenly, causing blotching. For best results, ensure compaction was correct first. Learn more in our guide Top 5 DIY Sealcoating Mistakes with AsphaltPavePro and How to Avoid Them.